Google Apps Script Deployment With Cloud Build
Google Apps Script can go way beyond a simple script that solves a problem. In this article I will showcase the way I deploy Google Apps Script code in an Enterprise environment. I will share the actual build file and the necessary steps and tools to reproduce my workflow. This approach does require Google Cloud Platform knowledge and a credit card. The instructions are high level, this article is not a codelab. If you get stuck, leave a comment on Twitter and I will try to assist and update the article.

Photo by David Gilbertson on Unsplash
When Google Apps Script is the best way to solve a problem I choose between three developnent workflows using:
- the, recently updated, Apps Script IDE.
- Git, clasp and the Cloud Shell Editor
- Git, clasp, Cloud Shell Editor, Cloud Source Repositories, and Cloud Build
The new Apps Script IDE is great. However it does lack some of the features that an Enterprise environment dictates, like version control and Continuous Deployment (CD). The Cloud Shell Editor is a huge step forward. I strongly advise to try it at https://ide.cloud.google.com.
But we are talking Enterprise level, so why keep things simple. Actually, using CD does a lot of advantages. When the CD pipeline is in place it becomes easy to deploy the script, separate the responsibilities and support multiple versions and implementations of the code. Using Git dictates version control and items like keep a changelog and Make a README makes sense in such a structure.
For me the most important advantage of using CD is the mindset that it enables. It provides an environment where I feel confident and safe to create small incremental changes in my applications. The podcast: The Pipeline: All things CD & DevOps Podcast by The CD Foundation, does a nice job of explaining that.
Hands on, how do we set it up
First we need a repository. Find a Google Cloud project with billing enabled and create a repository at https://source.cloud.google.com/.
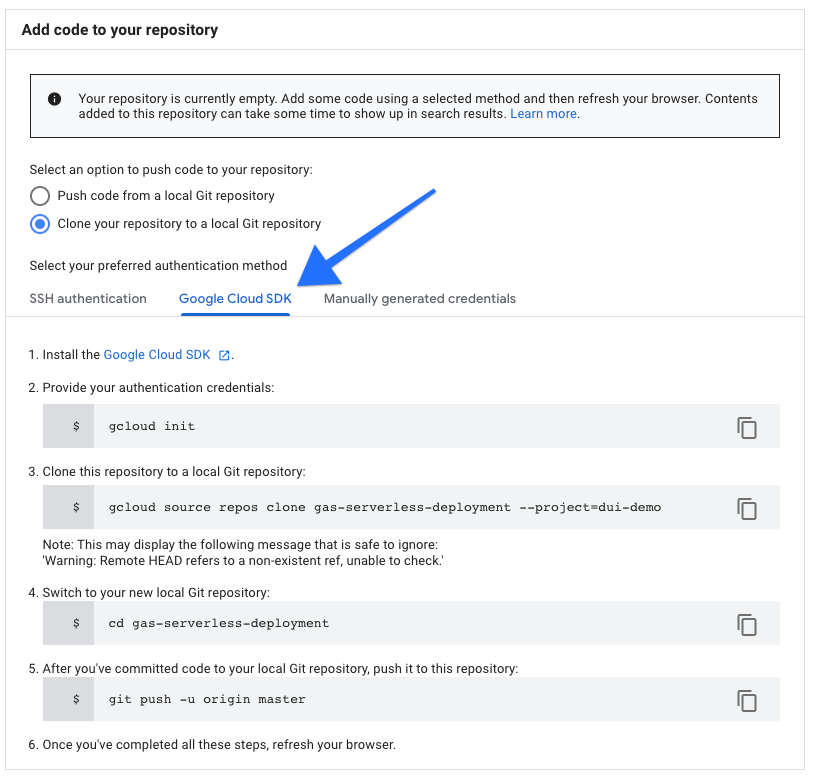
The repository screen
Once you created your repository, fire up the https://ide.cloud.google.com.
Open a terminal and create a local clone of your repository. Use the Google Cloud SDK method to clone the repository. Once the repository is cloned you can open the new directory as a workspace.
At this point you should have an empty repository open in the workspace. Next step is installing Clasp and fetch the clasp credentials. Install clasp using the following command in the terminal.
npm install -g @google/clasp
We need the clasp credentials in the cloud build. Type the command below and follow the instructions. Authorize with the account that you want to use in the cloud build.
clasp login --no-localhost
If all goes well the credentials are saved in the file ~/.clasprc.json. We will need that file later.
Enable the Apps Script API
The Google Sheet
It is possible to create a script with clasp itself, however in this case we will keep it simple and use a Google Sheet. So at this point create a Google Sheet and open the script editor. Find the script id and type the following command in the terminal:
clasp clone [script id]
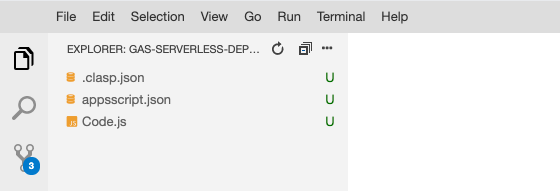
This is what you should see in the editor
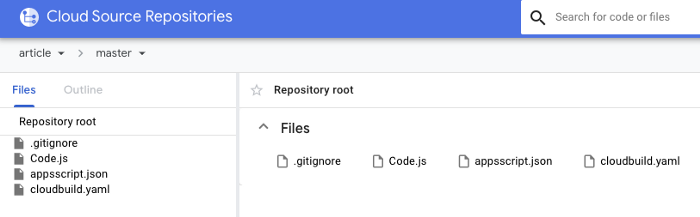
Create a .gitignore file and add .theia and .clasp.json to the file. Next add the example code from Custom menus in Google Docs, Sheets, Slides, or Forms to the Code.js file.
Now we are ready to create the build file. Create a cloudbuild.yaml file and add the following yaml:
All the code is in place now. In a real live deployment do consider keep a changelog and Make a README. Now you can commit the code. Git will ask you to do some configuration:
git config --global user.email "git@example.com"
git config --global user.name "Git Example"
Push the code and check if the code is in the repository
Now we can start the build. Enabel cloud build:
gcloud services enable cloudbuild.googleapis.com
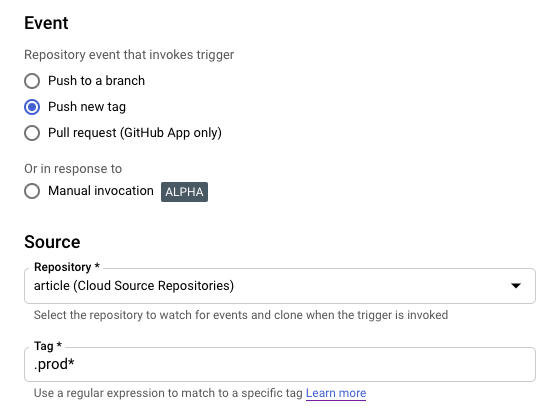
Go to Cloud Build and create a new trigger. Give the trigger a name and connect to the correct repository. For now use the following settings:
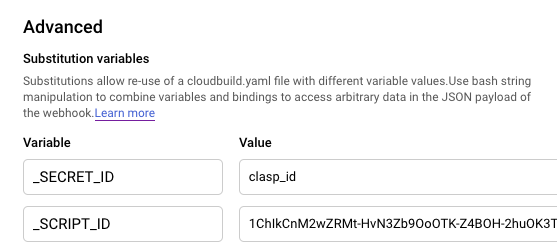
Also add the substitution variables, use your own script id.
In this step we will store the token for clasp. Go to the Secrets Manager and create a new secret clasp_id. The value of the secret is the content of the .clasprc.json file.
cat ~/.clasprc.json
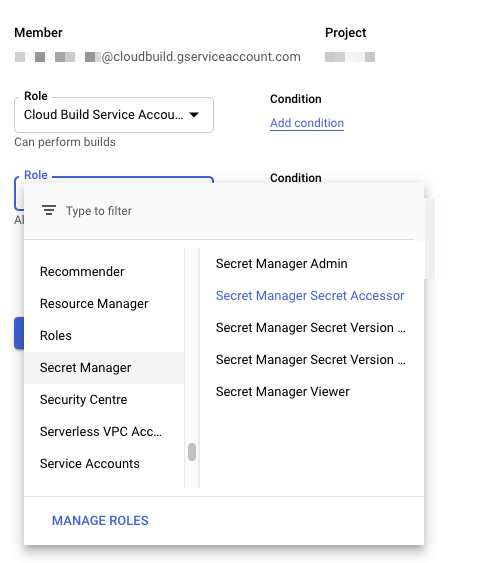
Cloud build needs access to the secrets, find the service account and assign the role Secret Accessor in the AIM:
Take a breath, almost there
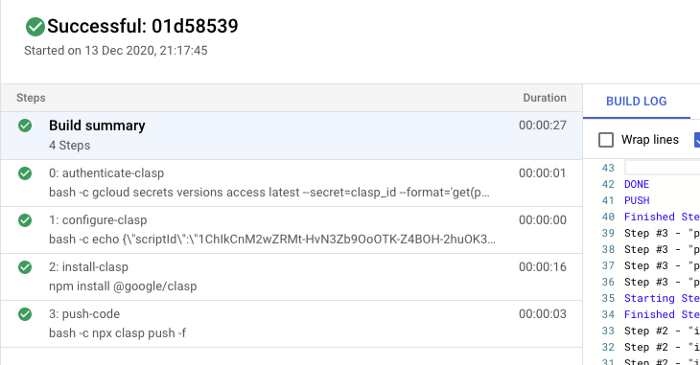
There are a lot of moving parts in this setup. We have a Google Sheet, a Git repository, a build trigger and a Cloud secret. The trigger will trigger a build when a tag like v1.0-prod is pushed to the Git repository. The build will execute the following steps:
- authenticate clasp by pushing the cloud secret value into the .clasprc.json file
- create the .clasp.json file with the script id
- install clasp
- push the code to the script
So if we type the following in the terminal:
git tag v1.0-prod
git push origin v1.0-prod
If all goes well you can see the build
Wrapping up
This might seem a lot of work just to maintain some scripts. If it is just a simple script, by all means use the great new editor. But what if you are not allowed to access the sheet? Or if you want to rollback a change? Or if you want to deploy to 25 sheets simultaneously?
This solution is meant for situations where you need a process in place that ensures a consistent deployment process. If required it also makes the separation of responsibilities easy. Only the repository and the build trigger need to be in the same project, assuming you use Cloud repositories. You can use authenticate with different accounts by storing multiple clasp tokens in the secrets.
I hope this method has given some insight in the options and power of the combining Google Apps Script and GCP. If you have any questions, or if you got stuck while implementing the example, please leave a comment in my twitter feed.
I will demo a serverless deployment strategy for #GoogleAppsScript on Totally Unscripted (https://t.co/s0NtzjBECz).
— Jasper Duizendstra (@duizendstra) May 10, 2021
The demo is based on this article.https://t.co/eNAy4BA8O7